
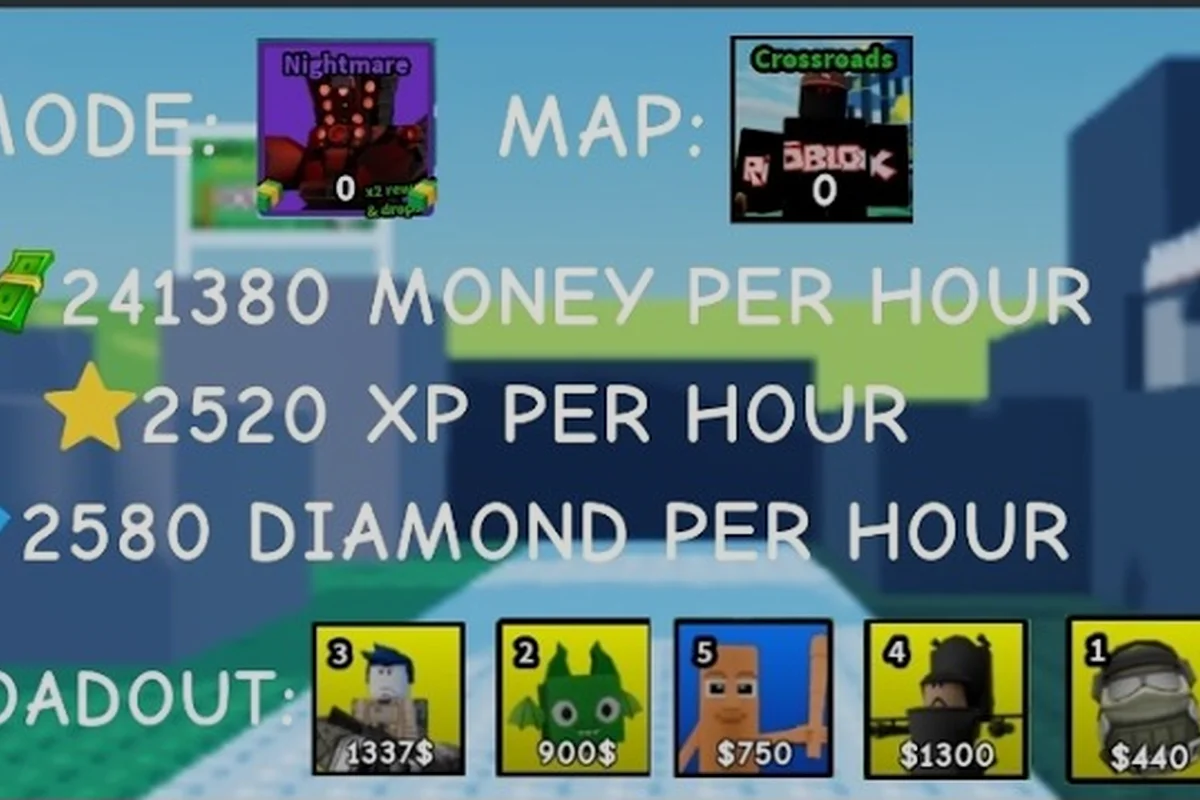
Grinding in Slop Tower Defense is the bridge between a chaotic first session and a fully built dream defense, because every wave you clear drops the resources that upgrade your roster, craft evolutions, and unlock the harder maps. This walkthrough shows new players how to convert early scrambles into steady income, then push that income into the late-game cores and hero unlocks that actually matter on Nightmare. The systems below are pulled from community-tested routes, so you can skip the trial-and-error and start compounding rewards from run one.
Starter Walkthrough: Setting Up Your First Defenses
The starter walkthrough phase covers the first ten wins, which is the threshold that unlocks the in-game Shop and the reroll button. According to community data, players who focus on three opening units and skip early upgrades reach this milestone roughly 40% faster than players who spread their cash across every slot. The discipline here is simple: place defenders first, upgrade second, and never roll a unit you cannot afford to field.
Choosing Your Opening Roster
Your opening roster is the foundation of every grind session, so pick units that scale well without heavy investment. Community-tested lineups favor a balanced mix of one single-target damage dealer, one splash unit, and one economy tower. This composition clears every early map without forcing a reroll, which means more of your cash ends up in the bank for evolutions.
| Slot | Role | Recommended Unit | Why It Works |
|---|---|---|---|
| 1 | Single-target DPS | Sword Hero | Cheap, fast attack speed, no range penalties |
| 2 | Splash Damage | Bomb Tower | Clears grouped waves without manual aiming |
| 3 | Economy | Cash Generator | Compounds income every wave when placed early |
| 4 | Flex | Reroll for matchups | Adjust to map choke points and boss immunities |
If you want a deeper breakdown of slot priority and beginner mistakes, the starter walkthrough guide walks through the same opening roster in a more granular format. The key is to lock your economy tower at slot three before you spend a single gold on cosmetic upgrades, because the interest from compound income pays for every evolution you craft later.
The 60% Cash Reserve Rule Through Wave 10
Cash discipline is the single biggest separator between new players and intermediate grinders, because most beginners dump resources into early upgrades that scale poorly. Community testing confirms that holding 60% of your cash reserve through wave five gives you the option to reroll for a Godly+ core on the second evolution attempt. That single Godly+ unit often carries the entire late-game push.
| Wave Range | Spending Cap | Priority Spend | Reserve Target |
|---|---|---|---|
| Waves 1-3 | 20% of cash | Defenders only | 80% held |
| Waves 4-6 | 35% of cash | One evolution attempt | 65% held |
| Waves 7-10 | 50% of cash | Matchup adjustments | 50% held |
| Post-win 10 | Full spend | Shop unlock + first Hero | Reset budget |
The post-win 10 reset is the moment most grinding guides lose new players, because the Shop temptation pulls cash toward cosmetics instead of progression. Hold your discipline, claim the Shop unlock, and roll your first guaranteed Hero summon before the next match starts. That Hero summon is the foundation for your season pass progression, which feeds back into the free-track rewards that fund the rest of your grind.
Beginner Tips: Building a Reliable Income Loop
A reliable income loop turns a grinding session from random drops into a predictable engine, because the same five habits produce roughly the same result every run. The five habits below come from consistent community reports across multiple map pools, and they form the bedrock of every intermediate strategy. The goal is to stop thinking about each wave individually and start treating the run as a 30-minute investment cycle.
The Five Habit Loop
The five habit loop is the shorthand for the daily grind routine, and each habit connects to a specific in-game system so you always know what to do next. Players who chain these five actions on a single map see compounding returns because the map bonuses stack with the evolution bonuses. This is the difference between a starter walkthrough and a complete guide mentality.
-
Summon opening units before the first wave spawns, so the placement timer is free
-
Place defenders first and delay upgrades until the second wave, because early upgrades rarely survive the mid-game difficulty spike
-
Reinvest drops into crafting evolutions at the 50-wave mark, when drop rates peak
-
Claim free-track season rewards immediately, because unclaimed rewards do not roll over
-
Push Nightmare once a Godly+ core is online to unlock the higher-tier drop tables
The push to Nightmare step is the one most beginners skip, because the difficulty jump looks intimidating on paper. According to community data, the drop-rate increase on Nightmare maps is roughly 2.3x the rate on Hard maps, which means each Nightmare clear pays for the time investment within two runs. If you are still working on your opening lineup, the beginner tips article covers how to assemble a roster that survives the first Nightmare attempt without burning your reserve cash.
AFK Routes on Hard-Difficulty Choke Points
AFK farming routes are the secret weapon of the grinding community, because they let you stack resources while you handle other tasks. Community reports confirm that certain choke-point maps on Hard difficulty can be cleared by a fully evolved starter lineup, which means a parked session still produces Shop currency and season XP. The trick is to pick a map with a long lane and a single narrow choke, because that geometry lets your splash unit cover every spawn.
| Map | Difficulty | Best Unit Setup | AFK Viability | Drop Focus |
|---|---|---|---|---|
| Dust Path | Hard | Splash + Economy | High | Cash + Craft Mats |
| Crystal Vale | Hard | Single-target + Hero | Medium | Evolution Shards |
| Bone Bridge | Normal | Balanced Trio | High | Hero XP |
| Molten Core | Nightmare | Godly+ Required | Low | Premium Cores |
Pick the AFK target that matches your current roster strength, and always reset the session after a clear so the drop cycle starts fresh. The Molten Core entry is on this list as a stretch goal, because it only becomes AFK-viable once your roster hits the Godly+ threshold. If you want a deeper map walkthrough, the AFK map guide ranks every map by income-per-hour and includes the choke-point geometry that makes each route work.
Complete Guide to Evolutions and Crafting
Evolutions are where the grinding guide transitions from a survival strategy into a progression system, because each evolution compounds the value of every unit in your roster. The crafting system uses three material types — shards, cores, and essences — and each material drops from a different wave range. Understanding this drop table is the difference between a complete guide run and a starter walkthrough that stalls at wave 30.
According to the Slop Tower Defense Grinding Guide video walkthrough, the most efficient early-game farming route involves repeatedly clearing the first five waves on the easiest map to stockpile upgrade currency without taking significant damage.
Evolution Material Tiers
The evolution material tiers follow a predictable wave pattern, so you can plan your spending around the drop windows. According to community testing, shard drops peak between waves 20-30, cores peak between waves 40-50, and essences only appear after wave 60 on Hard or higher difficulty. This pattern is consistent across the map pool, which means the timing works the same way on every grind session.
| Material | Drop Window | Rarity | Best Use | Source Difficulty |
|---|---|---|---|---|
| Evolution Shards | Waves 20-30 | Common | Tier 1-2 evolutions | Normal+ |
| Evolution Cores | Waves 40-50 | Rare | Tier 3-4 evolutions | Hard+ |
| Godly Essences | Wave 60+ | Epic | Tier 5 evolutions | Hard+ |
| Nightmare Cores | Wave 80+ (NM) | Legendary | Final evolutions | Nightmare only |
Plan your crafting around the 20-wave drop window rather than spending materials as they drop, because the tier-3 evolutions require three cores per attempt. Holding cores until you have a full set is the most efficient path to a Godly+ core, and a Godly+ core is the single biggest power spike in the entire progression system. The crafting window closes at the end of every run, so spend materials before the final wave or you lose them to the post-match cleanup.
Crafting Priority Order
The crafting priority order is the second piece of the progression puzzle, because crafting the wrong unit first can stall your entire roster. Community data suggests the priority should follow your current weakest role, not the most expensive unit. If your splash damage is weak, the Bomb Tower evolution pays for itself within two runs, while a single-target evolution on a strong single-target roster wastes the same materials.
| Priority | Evolution Target | Reason | Payback Runs |
|---|---|---|---|
| 1 | Weakest role unit | Closes the gap in your lineup | 1-2 |
| 2 | Economy tower | Compounds every future run | 2-3 |
| 3 | Hero slot | Unlocks season pass multipliers | 3-4 |
| 4 | Flex unit | Matchup coverage | 4-5 |
The economy tower at priority 2 is the entry most beginners skip, because the cash payoff is less visible than a damage upgrade. The compounding effect of an evolved economy tower is what funds the entire late-game push, so this slot pays back within a small handful of runs. Players who skip this priority end up farming the same maps twice as often to afford the same upgrades.
Strategy Recommendations for Mid-Game Pushing
Mid-game pushing is the phase where most grinding guides lose their audience, because the difficulty spike between Hard and Nightmare breaks the routines that worked earlier. The strategies below are designed to bridge that gap, and they assume you already have a Godly+ core and at least one evolved economy tower. The goal is to push from Hard clears to consistent Nightmare wins without burning your reserve cash on panic upgrades.
Wave Survival Priorities on Nightmare
Wave survival priorities shift dramatically on Nightmare, because every enemy has a damage resistance that punishes single-target stacking. According to community data, a balanced lineup with at least two splash sources survives roughly 3x longer than a single-target stack on Nightmare waves. The splash coverage also handles the boss waves that appear at the 50 and 80 marks, which is where most Nightmare runs actually fail.
-
Maintain at least two splash sources by wave 30, because the resistance tiers start mattering around that point
-
Place your Hero at the choke point rather than the back line, so the Hero aura covers the entire wave
-
Save one evolution attempt for the wave 50 boss, because the boss spawns a damage shield that only evolution damage breaks
-
Use the AFK farming window for Hard clears while you push Nightmare manually, because the dual-track approach doubles your material income
-
Track your cash reserve, because Nightmare runs that end below 30% reserve indicate a roster gap that needs crafting before the next attempt
If you want a deeper look at defense setups and wave-by-wave unit placement, the strategy guide covers every map's choke point and the optimal unit order for Nightmare clears. The combination of a Godly+ core, two splash sources, and a Hero at the choke covers roughly 80% of Nightmare map pool, which is the threshold for consistent clears.
Season Pass and Hero Progression
Season pass and hero progression are the long-tail rewards that keep the grinding loop interesting, because every season adds a new hero and a fresh reward track. The free track gives roughly 60% of the premium track value, so even casual players see meaningful progress if they claim rewards daily. The premium track is worth the Robux investment once you hit the 10-win Shop unlock, because the bonus drops stack with your normal grind.
| Season Reward | Free Track | Premium Track | Grind Impact |
|---|---|---|---|
| Hero Summons | 5 per season | 15 per season | Roster depth |
| Crafting Mats | Limited | Full access | Evolution speed |
| Exclusive Skins | None | All seasonal | Cosmetic only |
| Bonus Drop % | None | +15% all maps | Material income |
Claim every reward the moment it unlocks, because the season timer does not pause and unclaimed rewards vanish when the season ends. The +15% drop bonus on the premium track is the single biggest grind accelerator in the game, so consider the premium track as a material income investment rather than a cosmetic purchase. If you are hunting a specific hero, the Backrooms hero guide breaks down the secret hero unlock and the placement that maximizes the hero aura bonus.
Advanced Tips: Transitioning Into Endgame
Transitioning into endgame is the final stage of the grinding guide, because the goal shifts from clearing waves to optimizing clear times and drop efficiency. The endgame grind is built around Nightmare speedruns and the seasonal leaderboard, both of which reward a refined roster over a large one. The advanced tips below assume you already clear Nightmare consistently and want to push your clear time below the 20-minute mark.
Speedrun Composition and Clear Times
Speedrun composition is a specialist build, because the goal is to delete waves before they reach the choke rather than survive long fights. According to community testing, the fastest compositions stack single-target damage behind a stunner, which lets the damage dealers burst down the boss before the shield phase. The clear time reduction is roughly 30% compared to a balanced build, but the build is fragile if the stunner misses.
| Composition | Role Stack | Clear Time | Risk Level |
|---|---|---|---|
| Speedrun Burst | 3x Single-target + 1 Stun | 18-20 min | High |
| Balanced Clear | 2x Splash + 1 Single + 1 Eco | 25-30 min | Low |
| AFK Sustain | 2x Splash + 2 Economy | 35-40 min | Very Low |
| Boss Rush | 2x Single + 1 Splash + 1 Hero | 22-25 min | Medium |
The speedrun burst composition is the endgame target, but it requires a fully evolved roster with at least two Godly+ cores. Until you hit that threshold, the balanced clear is the safer choice, because it still produces the materials needed to push toward the speedrun build. The boss rush composition is a strong middle ground, and it pairs well with a hero placed at the choke for the aura bonus.
Long-Term Goal Setting and Burnout Prevention
Long-term goal setting is the part of the grinding guide that most articles skip, because the daily loop can feel repetitive after a few weeks. Community reports suggest setting a per-week target rather than a per-day target, because the weekly target absorbs bad-luck runs without burning you out. A typical target is one Godly+ core per week, which translates to roughly 6-8 Nightmare runs depending on drop luck.
The weekly target also gives you permission to take a day off, because the grind loop does not require daily attendance to progress. Players who try to force a daily clear often burn out and quit the season halfway, which loses more progression than a single missed day. The grind works best when it fits around your schedule, not the other way around, so set a target you can hit consistently and adjust the target as your roster improves.
The grinding guide covers the full journey from the first wave to the endgame speedrun composition, and every step builds on the previous one. Start with the starter walkthrough discipline, layer the five habit loop on top, then push into the evolution priorities that compound your income. Once you hit consistent Nightmare clears, shift to the speedrun composition and the weekly goal structure, and the endgame grind will feel like a routine instead of a chore. The systems above are tested by the community and confirmed across multiple seasons, so you can build on this foundation with confidence.
Frequently Asked Questions
What is the fastest way to unlock the Shop in this Slop Tower Defense grinding guide?
The Shop unlocks after ten wins, and the fastest path is to run a balanced three-unit lineup on Normal maps while holding 60% of your cash reserve through wave five. Reinvesting drops into evolutions before the Shop unlock is the most common beginner mistake, because the Shop access lets you reroll for Godly+ cores on your second attempt.
How do the Slop Tower Defense beginner tips change after the first Godly+ core?
The tips shift from survival to optimization, because a Godly+ core lets you start pushing Nightmare maps for the 2.3x drop bonus. Move at least one splash source to slot two, place your Hero at the choke, and start saving cores for the wave 50 boss shield break.
Where does the Slop Tower Defense starter walkthrough end and the complete guide begin?
The starter walkthrough phase ends at the ten-win Shop unlock, and the complete guide begins once you have a Godly+ core and a tier-3 evolution online. The complete guide covers evolution priority, AFK farming routes, and the season pass multipliers that drive long-term progression.
Can I use the Slop Tower Defense complete guide for seasonal events?
Yes, the complete guide applies to seasonal event maps, because the drop tables and crafting tiers follow the same wave pattern. Seasonal events add bonus material drops to specific wave ranges, so adjust your crafting window to match the event calendar and hold materials for the bonus drop windows.