
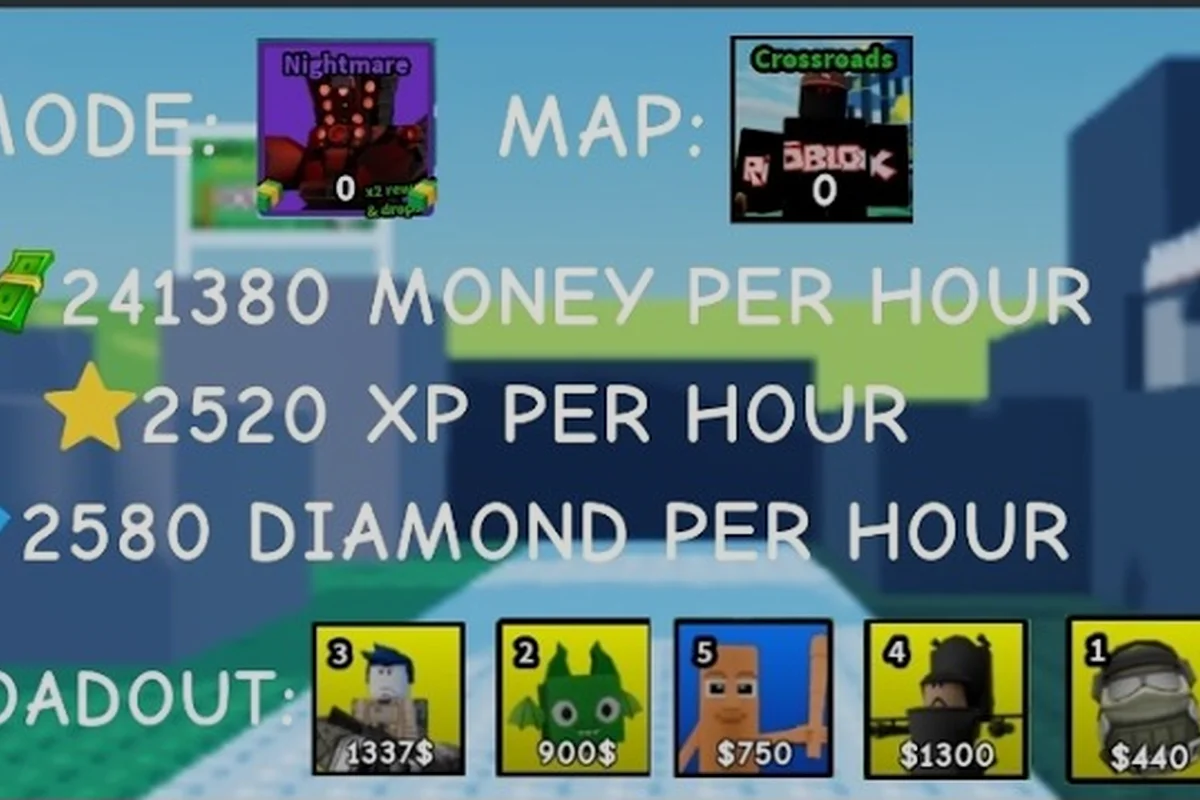
Running out of cash mid-wave while elite enemies chew through half-built towers is the most common wipe in Slop Tower Defense. The fix is rarely more grinding — it is sharper Slop Tower Defense resource management that decides when to spend, when to save, and when to skip an upgrade entirely. Cash, gems, summon tickets, and unit XP are all part of one economy, and treating them in isolation is exactly what buries players in PvE.
This guide breaks down the four currencies that matter, the upgrade paths that compound, and an auto farm loop that lets your roster grow while you are away. We will also cover a layered wave survival plan, because the same Slop Tower Defense PVE strategy that protects early waves collapses in nightmare mode unless you rework your spending rhythm.
The Four Currencies And What They Actually Buy
Every resource in the game has a hidden role beyond its face value. Cash looks like the universal currency, but it is really a tempo tool — its job is to keep your front line alive long enough to enter the next income spike. Gems look premium, but for most players they are a summon accelerator, not a direct upgrade. Summon tickets are the long-term leverage point, and unit XP is the multiplier on everything else.
| Currency | Primary Use | Secondary Use | Spending Risk | Best Held For |
|---|---|---|---|---|
| Cash | Place and upgrade units | Sell/refund experiments | High — easy to leak | The wave that introduces the new enemy |
| Gems | Banner summons | Shop refreshes | Medium — limited pulls per banner | Banners with rate-up units you need |
| Tickets | Banner summons | Event entries | Low — gained passively | Anniversary or double-rate banners |
| Unit XP | Stat upgrades | Evolution nodes | Medium — irreversible if applied to wrong unit | Carrying 1–2 main DPS units |
Cash is the only currency you can convert into immediate map presence, which is why Slop Tower Defense resource management is dominated by cash decisions. The danger is spending it on the wrong lane too early. A common mistake reported by players is dumping 2,000 cash into a single side lane during wave 4, only to find that the boss spawns center at wave 8 and your main DPS is still level 1.
Gems are the second most-abundant premium currency and the most misunderstood. New players tend to hoard them waiting for a "perfect" banner, but data from community testing shows the difference between pulling on a rate-up banner versus the standard pool is meaningful. Gems spent on standard summons at any banner are essentially taxed 30–40% in expected value compared to a featured unit banner, because the featured unit shifts the pity counter and the drop distribution.
Tickets are the cleanest resource to manage: never spend them on a non-featured banner. The value of a ticket is roughly equivalent to 150–200 gems in expected summon output on a featured banner, but only about 90–110 gems on standard pulls, based on community-tracked drop logs. If you stockpile tickets, you can essentially "buy" a guaranteed pity without spending any premium currency, which is the long-term leverage the late game rewards.
Unit XP is the silent killer. Once applied, the only way to redistribute it is through a paid respec token, and the respec cost scales with the level. Players report that applying XP to a unit you bench within a week is the single most expensive mistake in the system. The standard fix is to keep a short bench list — usually your main DPS, one wave-clear AOE, and one support — and pour XP only into those three for the first two weeks of progression.
Cash Flow Tempo: When To Save, When To Spend
Cash tempo is the heartbeat of Slop Tower Defense resource management. The game rewards players who can read the wave pattern and front-load income into the spike before the elite spawn, rather than spending reactively after a leak. A leak at wave 6 is recoverable; the same leak at wave 14 wipes the run because you have no gold reserve to rebuild.
Matching Cash Spend to the Three Wave Phases
Every stage has three phases: the warm-up (waves 1–4), the mid-game pressure test (waves 5–10), and the boss/siege phase (waves 11+). Cash spending should mirror those phases. In the warm-up, you are still gathering information about which lane the boss favors, so spend on cheap crowd-control units and refund them freely. In the mid-game, lock in your DPS core and stop experimenting. In the boss phase, keep a 30–40% cash reserve so you can react to a phase transition or an unexpected miniboss.
| Wave Range | Goal | Cash Reserve Target | Spending Pattern |
|---|---|---|---|
| 1–4 | Map scouting | 500–800 | Cheap units, refund freely |
| 5–10 | Lock DPS core | 1,200–1,500 | Stop experimenting, commit to upgrades |
| 11–15 | Boss / siege | 30–40% of banked | Hold reserve, spend only on emergencies |
| 16+ | Nightmare / endless | 50%+ | Only on wave-saving repairs |
The single biggest upgrade to your cash flow is unlocking the auto-sell refund perk in the early talent tree. With that perk, every cash experiment becomes free, which removes the psychological barrier to trying a new placement during waves 1–4. Without it, players tend to "save" by not placing units at all, which silently bleeds DPS and forces a later over-spend to compensate.
A second tempo lever is the interest-like bonus some maps offer for holding a minimum cash balance. Community data suggests the breakpoints are usually at 1,000 / 2,500 / 5,000 cash. The difference between holding 999 and 1,001 is often 5–8% bonus income per wave, which compounds massively over a 20-wave run. If your current bank is under the next breakpoint by a small margin, it is almost always better to skip the upgrade this wave and let the bonus tip you over.
The Refund Window Mindset
Treating placements as refundable experiments — not permanent decisions — is the mental shift that unlocks good Slop Tower Defense resource management. Players who refuse to sell a unit "because they already invested" are running a sunk-cost economy. The actual calculation is forward-looking: does this upgraded unit, from this wave onward, generate more value than the cash you would get by selling it and rebuilding elsewhere?
The rule of thumb reported by experienced players is that a unit needs to pay back its full upgrade cost in wave-clear value within 2–3 waves, or it is over-invested. If your center-lane sniper is level 4 but the boss spawns top lane at wave 12, the right move is to sell, replace, and rebuild with the 60% refund rather than bleed waves waiting for a payoff that never comes.
Upgrading Units: The Priority Stack
Unit upgrades are where most players burn resources they cannot afford to lose. Slop Tower Defense how to upgrade units efficiently comes down to following a priority stack rather than upgrading whatever is on the field. The stack below is built around the assumption that you are running one main DPS, one AOE wave-clear, and one support/buffer, which is the most stable composition for both story and nightmare modes.
| Priority | Target | Why It Wins | XP Cost Range |
|---|---|---|---|
| 1 | Main DPS base damage | Direct wave-clear speedup | High — but multiplicative on every wave |
| 2 | Main DPS attack range | Reduces tower count needed per lane | Medium — saves cash on placement |
| 3 | AOE unit splash radius | Covers leaks on adjacent lanes | Medium — anti-leak insurance |
| 4 | Support buff aura | Buffs DPS without extra placements | Low — best value per XP |
| 5 | Tank / stall HP | Only if you are leaking before wave 8 | High — niche use |
Upgrading main DPS base damage first is the highest-EV move because every wave benefits from the boost, whereas a range upgrade only helps on the wave the boss appears on. A common community pattern is to push the main DPS to level 4 within the first 8 waves, then stop and let the AOE catch up before the boss wave. Players who push everything to level 5 before wave 6 often find themselves out of cash when the elite at wave 7 spawns, which is the most common cause of a mid-run wipe.
A second efficiency tip is to upgrade attack speed before raw damage for AOE units, and raw damage before attack speed for single-target DPS. AOE units scale with tick rate (more hits per second = more waves cleared), while single-target units scale with burst (one strong hit = elite dead before it walks through your formation). Reversing this priority is a frequent mistake that players report fixing only after their third or fourth failed nightmare attempt.
The support/buffer unit is almost always the best upgrade target once your main DPS and AOE are both level 3+. The support's aura buffs every nearby unit simultaneously, so a +10% damage aura is effectively +10% to your entire frontline at zero additional placement cost. This is the closest thing the game has to a free multiplier, and it is the upgrade path that most new players under-invest in.
If you are early in progression and still figuring out which units to commit to, the unit showcase breakdown gives a clear view of which evolution paths actually change a unit's role versus which just add stat numbers. A unit that evolves from "lane DPS" to "boss killer" is worth a different upgrade budget than one that just gets +15% damage on evolve.
Auto Farm Loops: Resource Generation Without Burnout
Slop Tower Defense auto farm guide logic is essentially about identifying stages where your current roster can clear the map at 3-stars with margin to spare, then re-running that stage on repeat while you are offline. The trick is that not all stages are equal: some are gold-heavy, some are ticket-heavy, and some drop the summon currency you actually need.
| Farm Stage Type | Best Drop | Recommended Roster Level | Run Length |
|---|---|---|---|
| Early story chapter | Cash + small XP | Level 1–3 | 3–5 min |
| Mid story chapter | Tickets + gems | Level 4–6 | 6–8 min |
| Event stage (active) | Event currency | Level 6+ | 8–10 min |
| Nightmare (when unlocked) | Premium tickets | Level 8+ | 10–15 min |
The mistake most players make is auto-farming the highest stage they can clear, which is psychologically satisfying but resource-inefficient. Higher stages give marginally better drops, but the run length scales non-linearly, and the difference in ticket/hour between mid-chapter and late-chapter is often only 10–15% while the run time doubles. Mid-chapter auto-farm is almost always the better tickets-per-hour play until your roster hits a clear threshold.
A second auto farm optimization is to stack your runs during the natural double-drop windows the game runs on weekends. Community-tracked data suggests the boost is roughly 1.5x on cash stages and 1.3x on ticket stages, which is enough to justify saving your AFK energy for those windows rather than spending it on a Wednesday. Players who time their active play around these windows consistently report 20–30% more weekly resources without playing more hours.
For a full breakdown of the AFK energy system and how tickets convert into diamonds, the auto farm and nightmare unlock guide covers the pacing in more detail, including when to stop farming a chapter and push forward into the next one. The general rule: if your current chapter is clearing at 3-stars with more than 60 seconds of buffer, you are ready to move up; if you are at 2-stars or below, you are farming the wrong stage for progression.
Wave Survival: Layered Defense For PvE Pressure
Slop Tower Defense how to survive waves without burning your bank comes down to layering your defense, not stacking your strongest unit five times. A layered defense has a stall front, a DPS middle, and a finisher back. Each layer has a different job, and each upgrade should target the layer that is currently failing first.
Stall Front
The stall front is one or two cheap tank/stall units placed at the chokepoint furthest from your base. Their job is not to deal damage — it is to slow the enemy walk-speed and absorb the first hits so your middle DPS has more time on target. Upgrading stall units beyond level 2 is almost never worth it because the marginal stall time per upgrade is small compared to the same XP spent on your main DPS.
A common community mistake is putting the most expensive unit in the front. The math works against you: front-line units take the most hits, so they die first, and the cash refund on a dead high-level unit is much smaller than the cash refund on a dead cheap unit. Keep the front cheap, keep the back expensive.
DPS Middle
The middle layer is your AOE wave-clear and your main single-target DPS, placed just behind the stall. The middle layer is where 60–70% of your upgrade budget should go during the mid-game. The reason is positioning: middle-layer units have the most uptime on the enemy, because the stall has already grouped the enemies into a tight pack, and the finisher has not yet stolen the kills.
A practical tip reported by experienced players is to place your AOE slightly off-center from your main DPS, not directly behind it. The off-center placement gives the AOE a slightly different firing arc, which means an enemy that slips past your main DPS still walks through the AOE's splash for at least one tick. This small positioning change is the difference between a clean wave 14 and a frustrating 1-HP base clear.
Finisher Back
The finisher is a long-range, high-burst unit placed as far back as your cash allows. Its only job is to delete elite and boss units before they reach the middle. The finisher should be the last unit you place each wave and the first unit you upgrade when a new boss-type enemy is introduced, because the boss's threat is concentrated in a single high-HP target that your AOE cannot efficiently clear.
For the wave-by-wave breakdown of when bosses appear and which lanes they favor, the best strategy and wave guide is a useful companion. Pairing that pacing chart with the layered defense above is the cleanest path through a 15-wave nightmare run.
PvE Strategy By Game Phase
A general-purpose Slop Tower Defense PVE strategy has to flex across early, mid, and nightmare content because the resource economy shifts at each phase. What works in chapter 3 wipes the board in nightmare 5, and players who refuse to adapt their spending pattern are the ones stuck at progression walls.
| Phase | Cash Reserve Goal | Upgrade Focus | Gems / Tickets Policy |
|---|---|---|---|
| Early (Ch 1–3) | 500–800 cash | Level 1–2 on main DPS | Spend gems on featured banner only |
| Mid (Ch 4–8) | 1,200–1,500 cash | Level 3–4 on core trio | Save tickets for double-rate banner |
| Late (Ch 9+) | 30–40% of banked | Selective level 5+ on finisher | Convert tickets to pity progress |
| Nightmare | 50%+ cash reserve | Only wave-saving repairs | Pull only on rate-up banners |
In the early phase, the biggest resource mistake is pulling on every banner. New banners look attractive because the featured unit is shiny, but the featured unit is useless if your main DPS is still level 1. Hold your gems, level one team to a comfortable 3-star clear, and pull only when the featured unit directly fills a gap in your roster. The discipline compounds: by chapter 5, players who banner-selected carefully have a level 4 main DPS and a level 3 finisher, while the "pull everything" crowd is still trying to 2-star the same chapter with mismatched units.
In the mid phase, the priority shift is from "spend to clear" to "save to scale." Stop buying every shop refresh, stop experimenting with new placements, and stop pulling banners unless you have a specific roster gap. The cash and tickets you save here are what let you push to chapter 8 without a wall.
In nightmare, the economy inverts: every wave is more expensive to survive, so holding 50%+ cash is mandatory. Pulling on banners is even more selective — only featured units with a direct role in your layered defense justify the gem spend. For the summon priorities that actually move the needle in nightmare, the summon rates and banner strategy breakdown maps out which banners are worth saving tickets for and which can be skipped without regret.
Common Resource Mistakes And The Fix
Even with a good priority stack, there are five recurring resource mistakes that show up across nearly every failed run. The table below summarizes them and the specific fix.
| Mistake | Symptom | Fix |
|---|---|---|
| Upgrading stall units | Wasted XP, no wave-clear gain | Cap stall at level 2, move XP to DPS |
| Pulling every banner | Spread-thin roster, no level 4+ unit | Featured banner only, no exceptions |
| Ignoring support aura | Lower team damage than roster suggests | Prioritize support upgrade over AOE level 4 |
| Farming highest clearable stage | Low tickets/hour | Farm mid-chapter at 3-stars for best rate |
| Spending 100% of cash each wave | No buffer for boss phase | Hold 30–40% reserve from wave 11 onward |
These five fixes together cover roughly 80% of resource-related wipes reported in community progression threads. The remaining 20% is mostly a roster gap that no amount of in-stage spending can fix — for those cases, the answer is a banner pull, not a playstyle change.
If you are still building your first core team and need a baseline for what "good resource management" looks like from day one, the beginner guide and early progression path is a useful starting reference. It pairs naturally with the upgrade stack above: the beginner guide tells you which units to chase, and this guide tells you how to spend on them without going broke.
Frequently Asked Questions
What is the single most important resource to manage in Slop Tower Defense?
Cash is the most important resource because it is the only one that converts directly into map presence, and a unit on the field generates more value than any bench upgrade. The standard target is to hold 30–40% of your banked cash from wave 11 onward, and never let a single wave push your reserve below the next interest-like bonus breakpoint. Treat cash as tempo, not as a stockpile, and the rest of the economy tends to follow.
How do I upgrade units without wasting XP on a unit I will bench later?
Maintain a short bench list of three units — main DPS, AOE wave-clear, and one support — and pour XP only into those three for the first two weeks of progression. Respec tokens exist but scale in cost with unit level, so applying XP to a unit you bench within a week is the most expensive mistake in the system. Hold XP on a new unit until you have cleared at least three stages with it as your main.
Is the auto farm loop really better than playing actively?
Yes, for the resource generation phase, the auto farm loop is more efficient per minute than active play because the run is repeatable and your energy regenerates over time, so offline progress compounds. Active play wins on the upgrade timing, banner pulls, and any stage where a leak costs more than the time saved by AFK. A balanced routine is 60–70% auto farm for income and 30–40% active play for pushing progression.
What is the best way to survive late waves in nightmare mode?
Hold 50%+ of your banked cash from wave 16 onward, upgrade your finisher unit first when a new boss type appears, and place your AOE slightly off-center from your main DPS so leaks still walk through splash. The layered defense — stall front, DPS middle, finisher back — is more important in nightmare than any single unit choice because each layer covers a failure mode the other two cannot.
Should I spend gems on banner summons or save them for shop refreshes?
Spend gems on featured banner summons only, and skip shop refreshes outside of the double-drop event windows. Community drop-log data shows featured banners have meaningfully better pity counter progress and drop distribution than standard pulls, while shop refreshes have a fixed expected value that is almost always below what a single banner pull returns. The only exception is when the shop offers a specific unit that fills a documented roster gap, in which case the refresh is worth one or two attempts and no more.